How to Apply Tape-in Extensions Perfectly
- Michelle Slatter

- Oct 25, 2025
- 4 min read
If you’ve ever dreamed of effortlessly long, voluminous hair, tape-in extensions are a fantastic option. They offer a natural look, are gentle on your hair, and can be applied quickly. I’m excited to share everything I’ve learned about remy tape hair application so you can achieve flawless results every time. Whether you’re a first-timer or a seasoned pro, this guide will walk you through the process step-by-step with practical tips and gentle encouragement.
Understanding Remy Tape Hair Application: What You Need to Know
Before diving into the application, it’s important to understand what makes remy tape hair application so special. Remy hair means the cuticles are intact and aligned in the same direction, which reduces tangling and keeps your extensions looking silky and natural for longer.
Tape-in extensions come with a thin strip of adhesive tape that sticks to your natural hair. This method is less damaging than other types of extensions because it doesn’t require heat or glue. Plus, they’re reusable and easy to maintain.
Here’s what you’ll need to get started:
High-quality tape-in extensions (I recommend tape in remy hair extensions for the best results)
A fine-tooth comb
Hair clips for sectioning
Scissors (for trimming if needed)
A mirror and good lighting

Preparing Your Hair for a Smooth Remy Tape Hair Application
Preparation is key to a perfect application. Start with clean, dry hair. Avoid using conditioner or heavy oils before applying the extensions, as these can reduce the tape’s stickiness.
Next, section your hair carefully. Use a tail comb to create a horizontal part about an inch above the nape of your neck. Clip the rest of your hair up and out of the way. This clean sectioning helps the tape adhere better and ensures your extensions lay flat.
When you’re ready, take a small section of your natural hair—about the same width as the tape strip. The smaller the section, the more natural the result, but don’t go too thin or the tape won’t hold well.
A quick tip: Always work from the bottom layers up. This way, you can blend the extensions seamlessly with your natural hair.
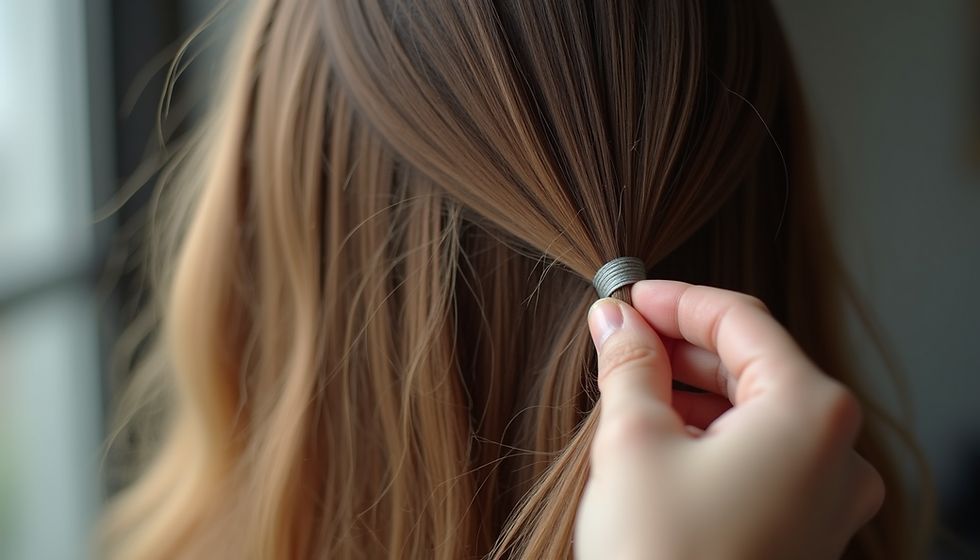
Step-by-Step Guide to Applying Tape-in Extensions Perfectly
Now for the fun part! Here’s a simple, step-by-step process to apply your tape-in extensions like a pro:
Peel the backing off the tape carefully to expose the adhesive.
Sandwich a thin section of your natural hair between two tape strips. One strip goes underneath the section, and the other on top, pressing firmly to secure.
Press the tapes together for about 10-15 seconds to ensure a strong bond.
Repeat the process across your head, working your way up in neat rows.
Trim and blend the extensions if needed to match your natural hair length and style.
Remember, the key is to keep the tape strips flat and avoid overlapping them. This prevents lumps and ensures a smooth finish.

Caring for Your Tape-in Extensions: Tips for Longevity and Shine
Once your extensions are in place, proper care will keep them looking fabulous for weeks. Here’s how to maintain your new look:
Avoid washing your hair for 48 hours after application to let the tape set fully.
Use sulphate-free shampoos and conditioners to protect the adhesive.
When washing, gently massage your scalp and avoid rubbing the tape areas.
Brush your hair daily with a soft-bristle brush, starting from the ends and working up to prevent tangling.
Avoid using heat tools directly on the tape area to prevent weakening the adhesive.
Schedule reapplication or adjustment every 6-8 weeks to keep your extensions secure and looking fresh.
With these simple steps, your extensions will stay silky, shiny, and natural-looking for longer.
Troubleshooting Common Issues with Tape-in Extensions
Even with the best care, you might encounter a few hiccups. Here’s how to handle some common problems:
Tape lifting or slipping: This usually happens if the hair was oily or dirty before application. Clean the area gently and use a tape adhesive booster if needed.
Extensions feeling heavy or tight: This could mean the sections are too thick or too many extensions were applied. Remove some and redistribute for comfort.
Tangles near the tape: Make sure to brush regularly and avoid sleeping with wet hair. Use a detangling spray if necessary.
Visible tape strips: This often means the extensions are placed too low or the hair sections are too thick. Adjust placement higher and use thinner sections.
Don’t be discouraged by these issues. With a little practice and patience, you’ll master the art of tape-in extensions in no time.
Your Next Steps to Gorgeous Hair
Applying tape-in extensions perfectly is a skill that anyone can learn with the right guidance and tools. Remember to take your time, prepare your hair well, and follow the steps carefully. If you want to explore premium options, I highly recommend checking out tape in remy hair extensions for quality you can trust.
Enjoy the confidence and beauty that comes with flawless, natural-looking hair. You deserve to fall in love with your hair every day!
Happy styling!


Comments